
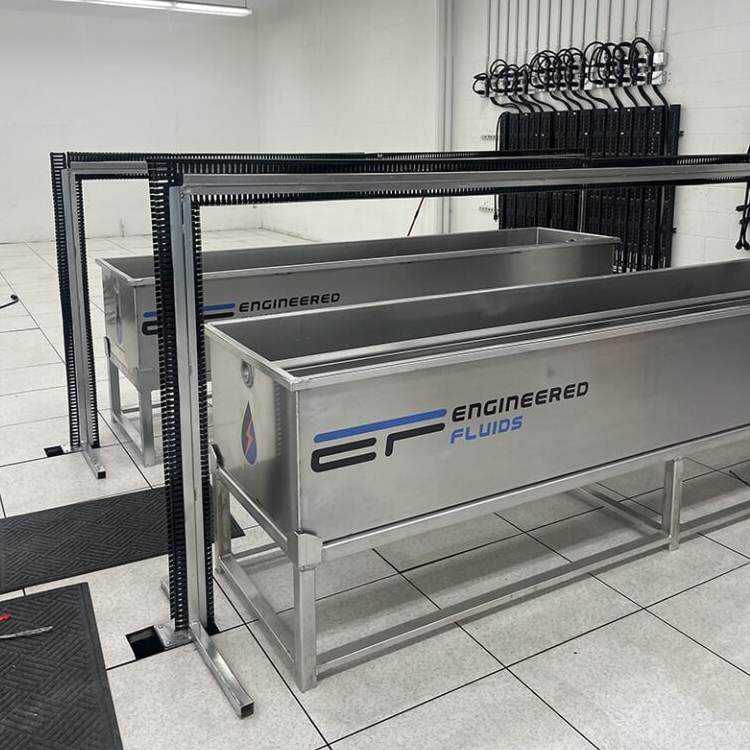
SLICTanks™
Engineered Fluids’ SLICTanks represent the most advanced designed single-phase, liquid immersion cooling tanks available today. The SLICTank Generation 5 design is the culmination of over 3 years and $500K in computational flow analysis to develop the optimal shape, flow, and design for increasing hash rate performance through the best fluid flow management and heat transfer performance!
- Extensive ongoing testing
- Ensure compatibility with our BitCool Dielectric Coolant
- Maximize your Hashing Performance
- Ability to safely overclock your miners to increase hashing performance without exceeding the devices ASIC, GPU, or FPGA manufacturer’s skin temperature (typically 100C)
- Proprietary, adjustable flow control management system ensures even and full flow to every device in a SLICTank providing maximum performance
- Safely hash faster
- Protect your valuable equipment
- Reduce maintenance
- Optimized to provide the highest flow rate and highest heat dissipation available
Crypto & Blockchain
The Engineered Fluids’ SLICTank has been optimized to provide the highest flow rate and highest heat dissipation available using Engineered Fluids’ BitCool or ElectroCool Dielectric Coolants. Our proprietary, adjustable flow control management system ensures even and full flow to every device in a SLICTank providing maximum performance even when supporting various devices in a single tank.
Design ServicesSustainability
We want to change the way the world cools all electronic devices and help our planet at the same time! We believe that we can reduce the energy demands and increase the performance of any electrical device that generates waste heat (which is all of them!).
Learn More